Lightroom Tutorials – HDR in Lightroom 6 & CC
Hey everybody, If you didn’t already know, you can create HDR images in Adobe Photoshop Lightroom 6/CC. I’ve been shooting HDR images (bracketed shoots) for a while now and I absolutely love it!
What is HDR?
First let me loosely explain what HDR is… HDR stands for High Dynamic Range and this is a technique used in Photography to “balance out” the light and dark portions of your image. The advantage of HDR is that you can make your image resemble what “the human eye” sees. HDR will typically bring out some of the details that would normally be lost in a single exposure. (example: taking a sunset shot, where the highlights are blown out) What I personally love about HDR is you can also create some pretty “crazy” images with a surrealistic look. Now, It’s up to you as the Photographer/Artist to determine if you want your HDR images to be tame or “bananas.”
How the heck do I start?
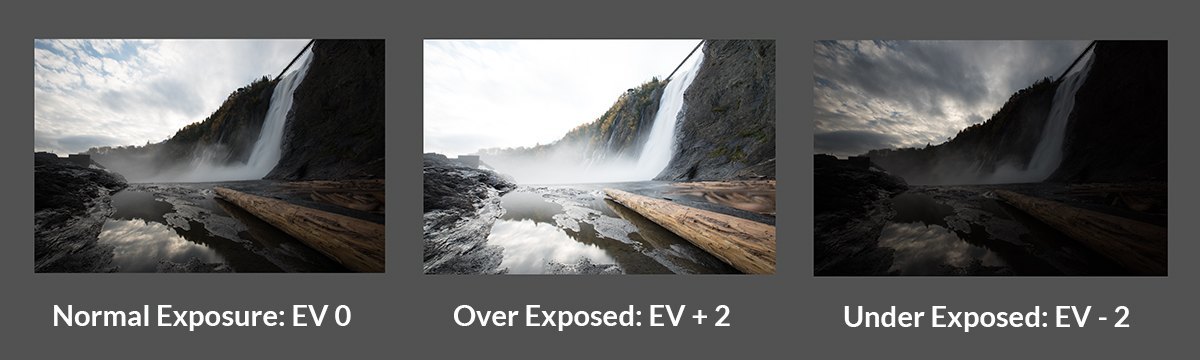
The first step starts with your camera. You will need to take three or more exposures (bracketed shots) of your subject. What the “fiddlesticks” are bracketed shots you ask? Basically bracketed shots are three different exposures of the same subject. Example: Your first shot will be at a “Normal Exposure” the second shot will be “Over Exposed” and your last shot will be “Under Exposed.” By taking three different exposures you have now captured tons of detail in the Highlights and Shadows. (See exposure sample below in Step 1.) Most cameras have a “bracketing feature” so I suggest checking out your camera’s user manual for easy set up.
Tips: When taking your photos, use a sturdy tripod to ensure there is no movement between exposures. Also try using Aperture priority mode on your camera. Aperture Priority Mode is the letter “A” or “AV” on your camera’s “sub command dial”… same place as your Auto or Manual settings.
HDR in Lightroom 6 / CC
Step 1. Below you will see 3 different exposures of the same image. Exposure Values = EV 0, EV+2, EV-2
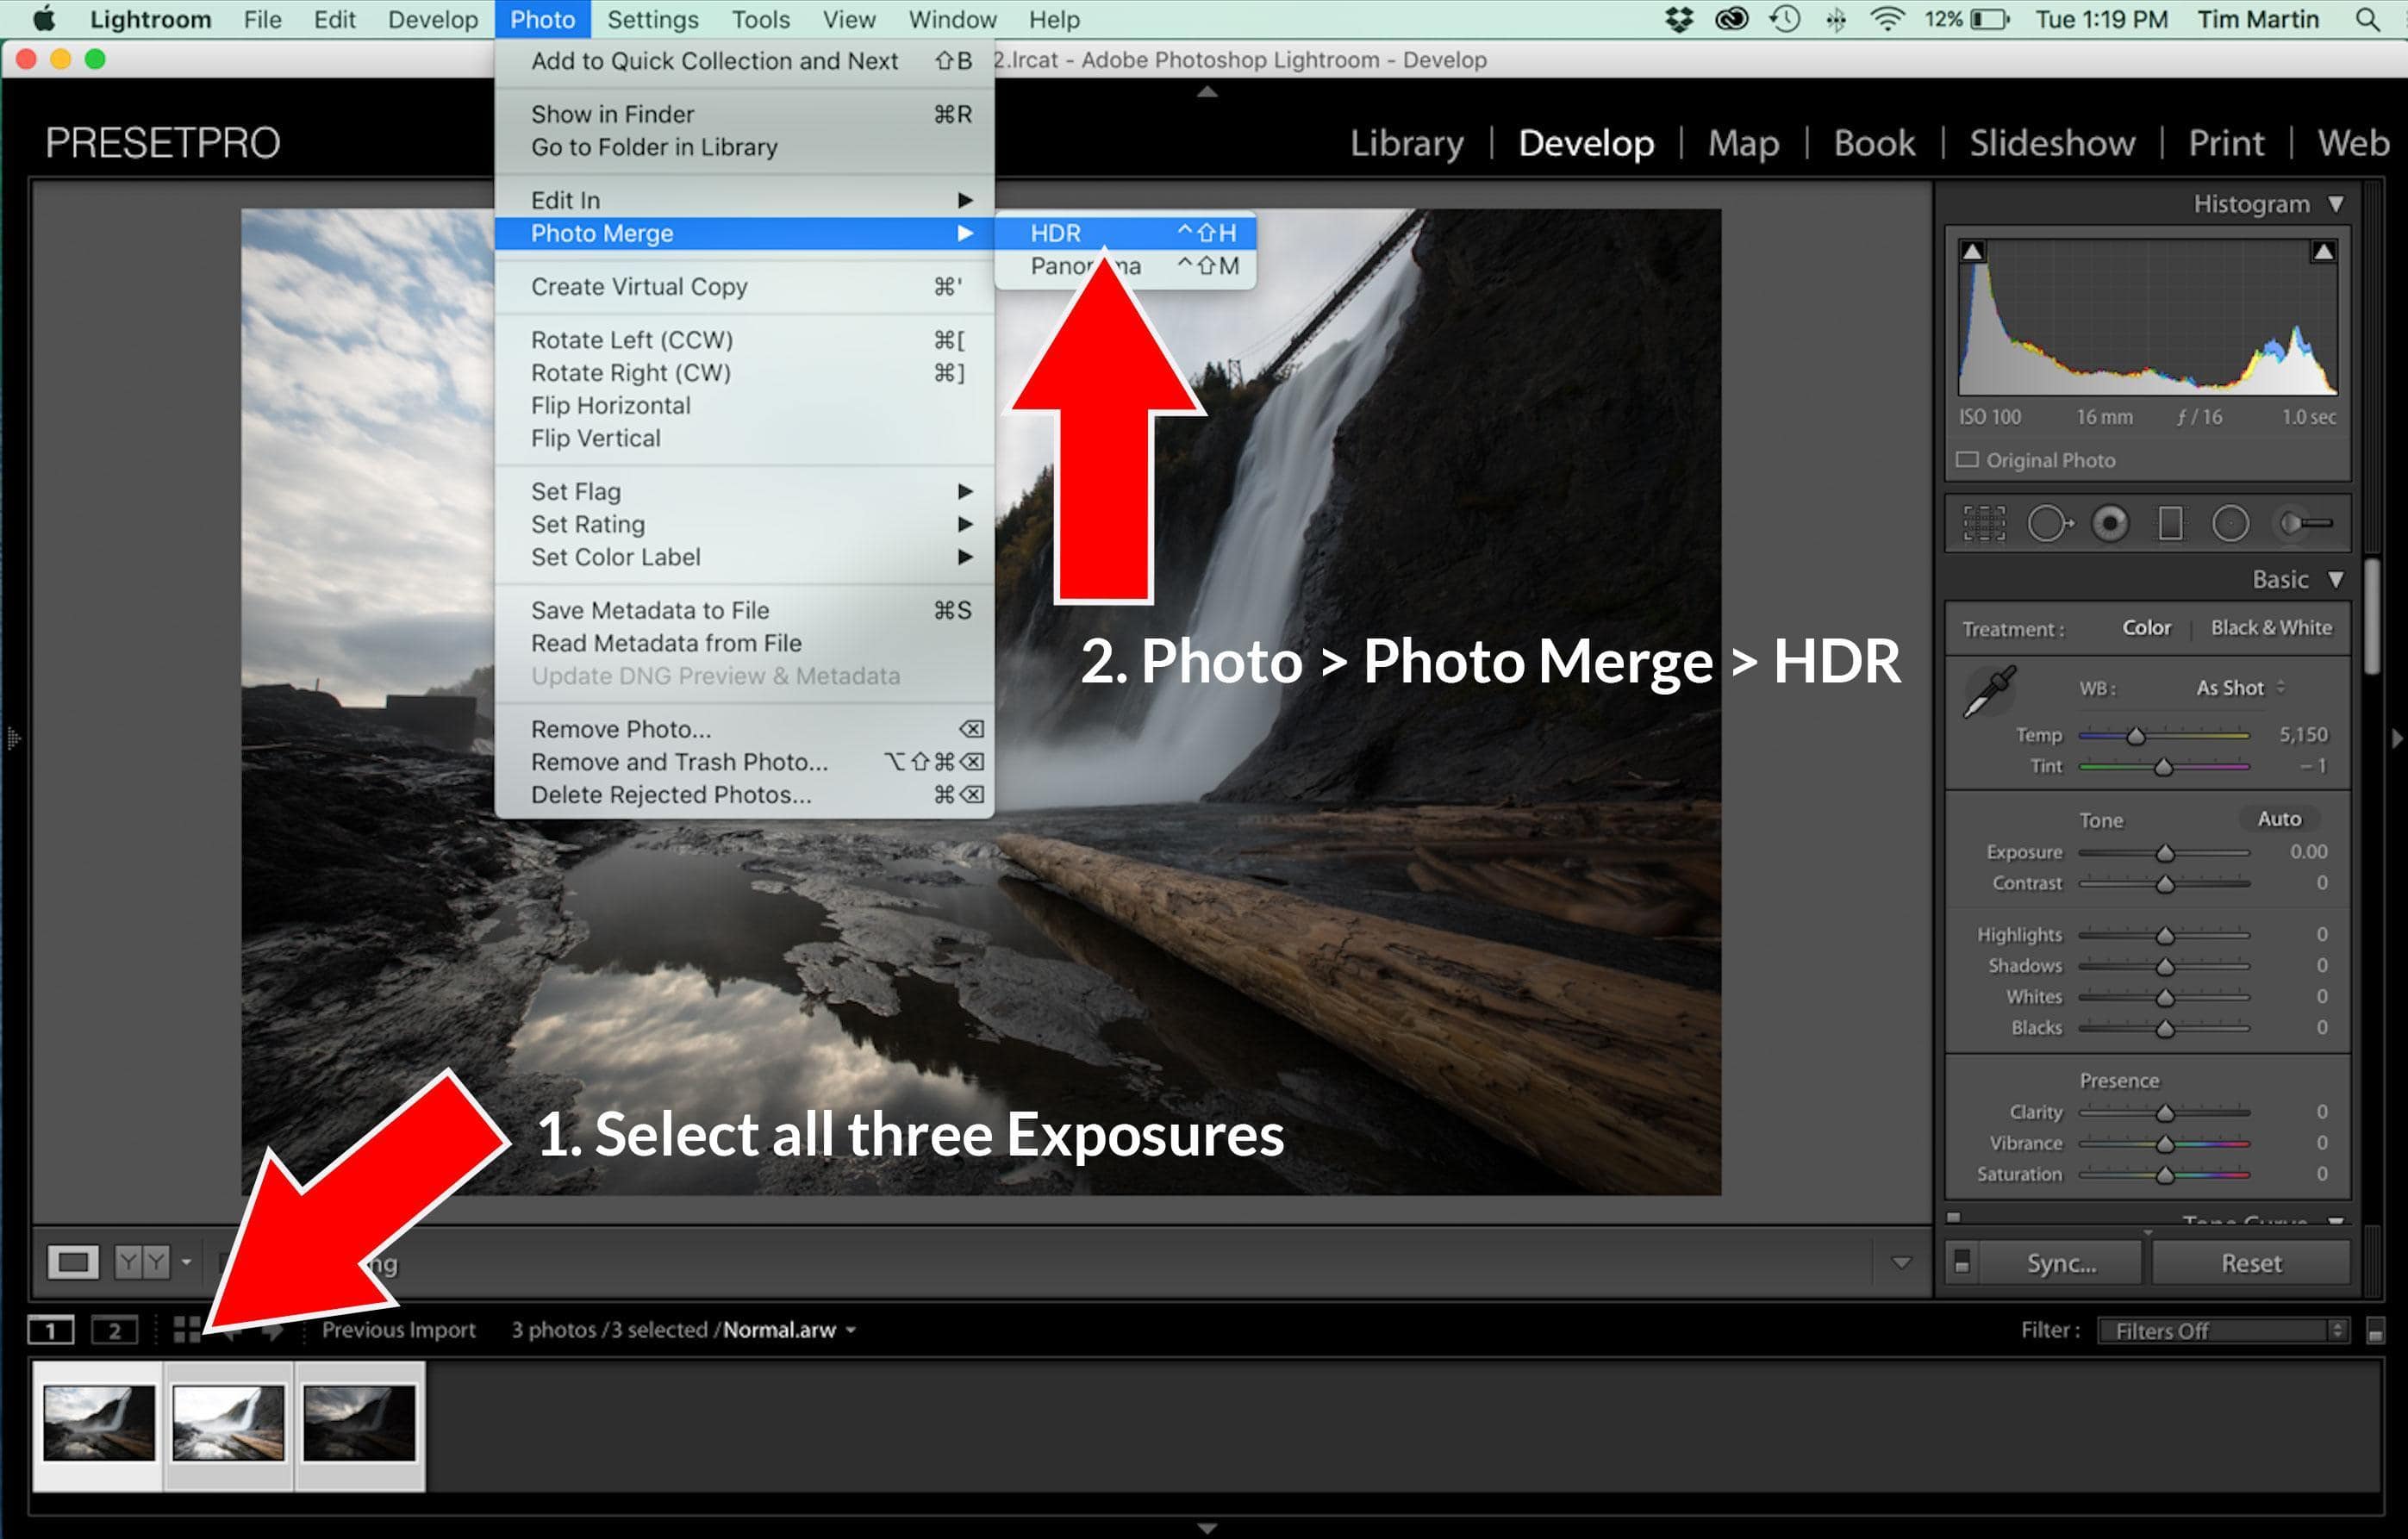
Step 2. Select your three images/exposures and go to: Photo > Photo Merge > HDR
Step 3. Lightroom will now preview your HDR image with a few extra options.
- Auto Align: Check this box so your images will automatically align.
- Auto Tone: This feature gives you a preview of what your image will look like.
- Deghost Amount: Perfect if you have objects moving in your images, such as clouds.
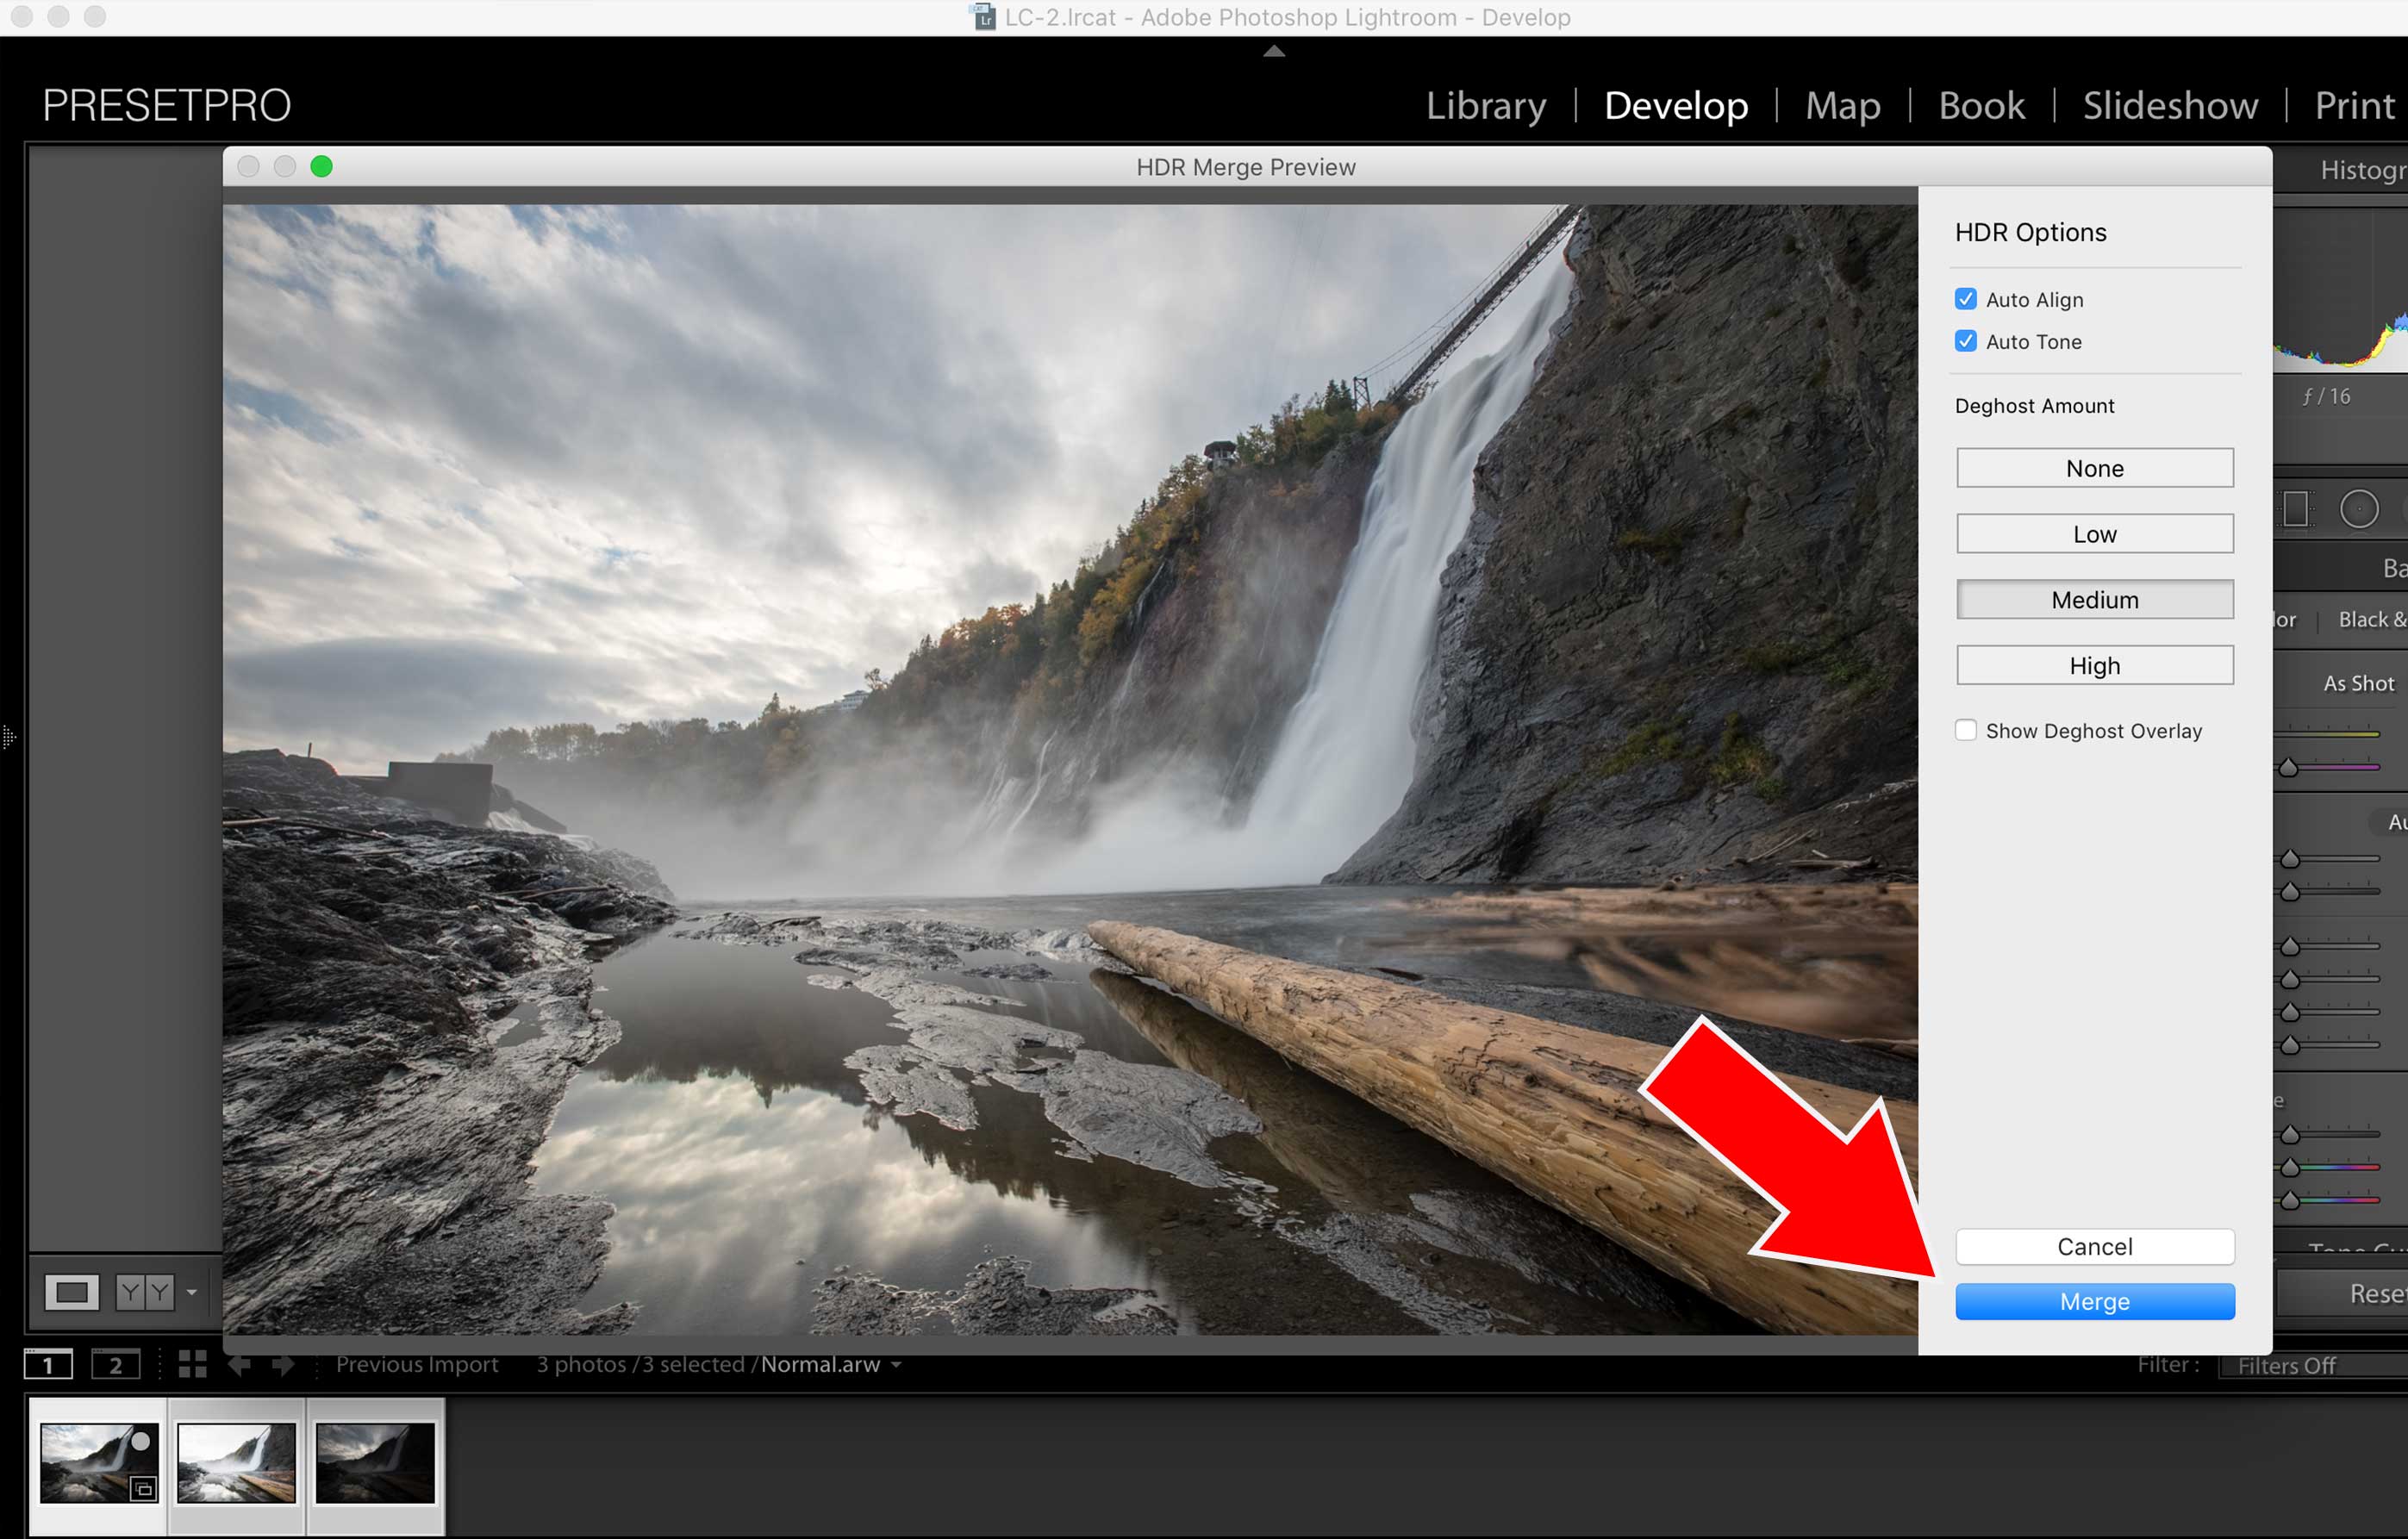
Step 4. Click “Merge” and you will get a new image (DNG File) in your Lightroom with a ton of digital goodness in your shadows and highlights.
Adobe Photoshop Lightroom 6/CC is a great way to start exploring the world of HDR! Check out my final image below using HDR in Lightroom as one of the steps in producing my final image. Please note: I used Photoshop, Photomatix HDR, Lightroom HDR, Lightroom Presets and Brushes to create my final image. I will be posting more videos and articles about my process shortly!

Looking for Lightroom Presets? Check out the Creative Flow and enjoy over 1000 Lightroom Presets & Creative Brushes: The Creative Flow is the ultimate workflow and premium preset collection by Presetpro. The Creative Flow is your own personal preset “tool box” where you can swap out tone curves, change base settings or easily color tone your image with a few simple clicks. When you purchase the Creative Flow you get all of our premium collections (at a discounted price) plus the Creative Flow workflow and Creative Brushes. Enjoy the power of 1000 + Lightroom presets integrated into one simple and easy to use workflow! The Creative Flow works with RAW and JPEG images and will run in Lightroom 4, Lightroom 5, Lightroom 6 and the Creative Cloud.
Creative Flow
Creative Flow & Bundles
Lightroom Presets

Lightroom Presets

Lightroom Presets
Lightroom Presets
Lightroom Presets
Lightroom Presets
Lightroom Presets
Lightroom Presets

Lightroom Presets